Thứ Ba, 30 tháng 8, 2011

Crafty jewelry: Recycled Sweater Wool Jewelry!

allearrings1  
Crafty jewelry: Recycled Sweater Wool Jewelry!
Jewelry making
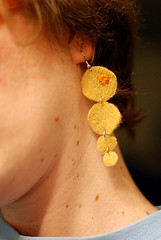
It’s a simple concept: cut a shape or two or more from a felted wool sweater, attach the pieces to jewelry parts – that’s it!  Well, that’s not really it though, you can make it so much more!
A little background – the yellow hoops were the first thing I made with this idea; when I made my embellished cardigan, I had some yellow ovals left over from the pockets, and I thought, hmm, I could make those into something… I cut the centers out, stuck on some earring wires, and that was that!  Rad!  I played around with the idea a bit further then, making those blue teardrops below, adding some embroidery this time:
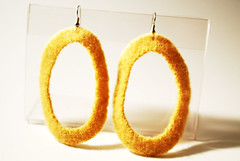
yellowhoopearrings blueearrings
Well then I thought, this seems like such a perfect class project – not too many materials or tools needed, super simple concept, but with infinite creative possibility!  I bet students could do all kinds of creative things with the concept, I thought… Well, hoo-boy was I right!  Check it out, these are what four crafters did in my most recent class:
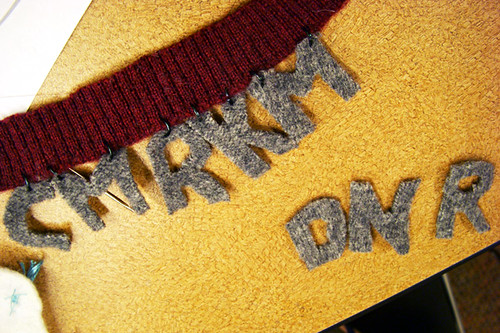
studentsearringsandjack studentsletters
studentsnecklace studentsearrings
I hope they don’t mind me sharing their awesome creations.  I didn’t take photos in any of the previous classes, which I now regret – every single class has had amazing pieces!  Don’t you love that pendant on the bottom?!  I do!  It was made by the library helper at the Sellwood branch, who clearly has fabulous color sense and design talent!
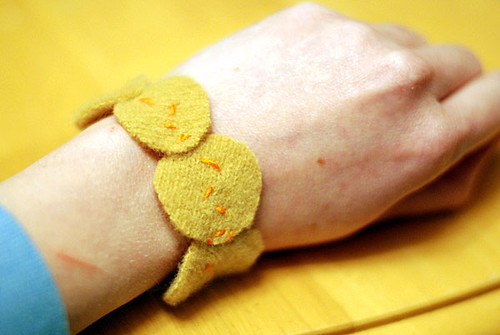
yellow bracelet yellow earrings
I made these pieces as more class examples – a matching set of earrings, fastened together with jumprings, and a bracelet, the pieces stitched together with embroidery floss, to show different ways of joining parts.
yellowset
So for this project, you’ll need:
  • Recycled wool sweater pieces, felted (great for using leftover scraps after making bigger projects from felted sweaters)

  • Scissors

  • Jewelry findings of your choice (depending on what kind of jewelry you’re making)

  • Jewelry pliers

  • Embroidery floss and/or thread (optional, depending on your design) and needle

  • Optional cheap felt and pins for using templates

And the “tutorial” from my class handout…
This project is very free form, not requiring a step-by-step how-to, but the basic steps are:
Cut shapes from felted wool.
Use felt shapes to make jewelry, by either
-stitching pieces together with thread/embroidery floss/yarn
-or joining pieces together with jump rings.
Attach clasps, earring wires, or other finishing parts.
Add embroidery decoration or other optional embellishments.
When stitching parts together, if you want the piece to be able to stretch, use zig zags or diagonal stitches.
Use jewelry pliers to work with jumprings, clasps, and other parts to close them tightly.
Cut any shapes you want, either freehand or using a template (paper or felt).  If you want 2 identical parts, cut 1 first, then pin that one to the second piece to cut it the same.
Of course, I’m there for individual help in the classes, with using pliers, sewing, etc, so I’ve linked to a few how-to sites to help you along with any parts you’re not familiar with.  You can also usemy earring making tutorial on Craftstylish for help with jewelry-making steps.  If you want a book to help, I definitely recommend Susan Beal’s Bead Simple – she’s the one who taught me how to make earrings!
templates
These are craft felt templates I cut for students to use if they want.  If you’re not sure what shape(s) you want, or you want multiple identical shapes, it’s a good idea to play around with some cheap craft felt before cutting into your sweater.  You can try different shapes until you get it just right, then pin the shape onto your sweater and cut around it.
As for felting, this is also on my class handout (see Diane’s felting post on Craftstylish for my detail):
To make recycled wool felt at home, choose a sweater made of 100% wool, or with other animal fibers (like alpaca, angora, cashmere).  Machine wash and dry the sweater on hot or warm settings; this will shrink and “full” the sweater, turning it into felt.  If you want it thicker/denser, wash and dry it again to felt it more.
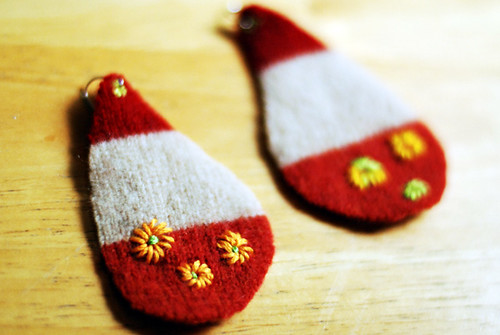
redearrings4
These are earrings I made during a couple of classes, and probably my favorite ones I’ve made.  Still not nearly as creative or elaborate as some of the students’ creations, but I like the simplicity of them, since they’re pretty big and bright.  (I tried to photograph myself wearing them straight on, so you could see both earrings in the same shot, and this is the best I could get, hah!)

redearrings2 redearrings1
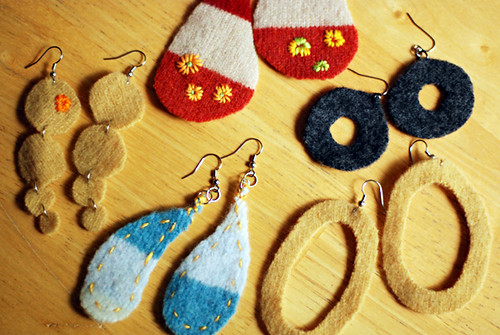
And here are all of my earrings… Obviously, I like making earrings more than other kinds of jewelry, probably because I rarely wear jewelry besides earrings andcuffs.  I had plans to embroider on those dark grey rings, but I think I’m going to leave them alone; again, I like the simplicity…
allearrings1  
Source: leethal.net

Crafts for fashion: add a zip pocket to shorts in 5 easy steps and 15 mins!

You can add a useful pocket to your shorts like this in 5 steps and 15 mins! 
Just perfect for carrying your keys and phone when you go out for a walk or perhaps a jog!
Crafts for fashion: add a zip pocket to shorts in 5 easy steps and 15 mins! 
Sewing patterns
You can add this pocket to any item of clothing , and make it just the size you need!
Here's how:
Step 1.
Get the item of clothing you want to add your pocket to, 
 2 pieces of fabric the size of the pocket you want
and 1 zip the size you want!

Step 2.
Place one piece of the pocket fabric on the outside of your clothes item where you want it to be, and pin into place.
Then using a pencil and ruler, draw a rectangle where you want the opening for the zip to be - use your zip as a guide for the size:
Step 3.
Machine stitch around all sides of the rectangle you have drawn...
and then cut a line down the centre of the rectange (through both pieces of fabric)

Cut the corners like this:

Step 4.
Push the pocket through to the back of the main clothes fabric. If you like you can press this to help you keep it flat:
Then pin the zip into place, so the part you open is showing through your new hole!

Stitch around the zip using the zipper foot on your machine to get nice and close:
Step 5.
Turn to the back of your pocket - and pin on the other piece of pocket fabric:
Then stitch around all 4 sides to enclose the pocket!

DONE!

Now pop in your keys and phone - and head on out for a lovely walk!


Source: jembellish.blogspot.com

Recycling paper: the mystical book

so i was assigned to make three scupltures for school, and like any good student, i was putting it off 'till the last minute. then i saw the challenge, and thought i could totally do both! i got the book at a garage sale for 25 cents, so this is what i came up with (cut out pages for sea/garden, and used them in origami) im not sure what the font is, i think it's times new roman. i kinda made the origami up as i went/ remembered the ones i used to do as a kid, anyway, here it is


overall look


mystical flower


person in mystical garden


townspeople/town


local fisherman w/ giant fish!


one page


Source: Craftster.com

Gift presents for kids: Pimp those baby pants!


BASIC NEWBORN BABY PANT
 A sewing pattern and tutorial by Rae Hoekstra
Please read this first:
I’ve made this pattern available for free with the intent that it be used for personal (not-for-profit) use and that it be accessed here at Made By Rae and not copied or distributed elsewhere.  Please link back to this post to your heart’s content, but please don’t post this pattern, the tutorial or any of the images below on your own website. If you borrow any of the images above (that’s fine), please link back and give clear and proper photo credit. Thanks!
Step-By-Step Sewing Instructions:
1. Print and cut out pattern pieces and tape together along dotted line.
2. Cut out two pant panels on the fold. Mark the leg seam and center seam edges (I cut a little tab along the edge of the leg seam as I was cutting).
3.  Open up each piece and line the two pieces up with their right sides facing:
4. Sew the pants together along just the center seams with a 1/2″ seam. Make sure you don’t sew all the way down the leg, just the center seam!
5.  Trim center seam to 1/4.” Open up pants and press seams apart.
6.  With center seams lined up and pants still inside out, sew inner leg seam from cuff to cuff with a 1/2″ seam.  Trim to 1/4″ and press seam.
7.  Fold 1/4″ over at waistband, press.
8.  Fold another 1/2″ over at waistband, press again.
9. Decide which side of the pants will be front and which will be back.  Starting at the back, sew around the folded section to form a waistband casing.  Leave a 1″ gap for elastic at the back.  I also put in a ribbon hanging tab for Mr Rae at this point to help him tell front from back, but honestly it doesn’t really matter. 
10.  Cut waistband elastic from 1/4″ or 3/8″ wide elastic (Length = [waist of baby +1"] 13″ is usually fine for a newborn baby)
11. Using a safety pin or bodkin, thread elastic through waistband.
12. Overlap ends of elastic by about 1/2″ and zigzag stitch back and forth a few times to secure. Tuck elastic inside waistband and stitch waistband shut.
13. Fold under 1/4″ at bottom of cuff:
14. Fold another 1/4″ under at the bottom of cuff and sew down.  Repeat for other leg.
Put those pants on your baby and admire! As usual, if you find any mistakes here or anything that needs clarifying, will you please let me know?  Enjoy!!!
Come back tomorrow (UPDATED: Monday! Sorry, Halloween costumes got the better of me) and I’ll show you how to make the pockets (they work on the B3Ps too as well as a boatload of other things) and add the trim at the cuff.


Source: made-by-rae.com

Gift presents for kids: Sweet Minky Tutorial

 
 Gift presents for kids: Sweet Minky Tutorial
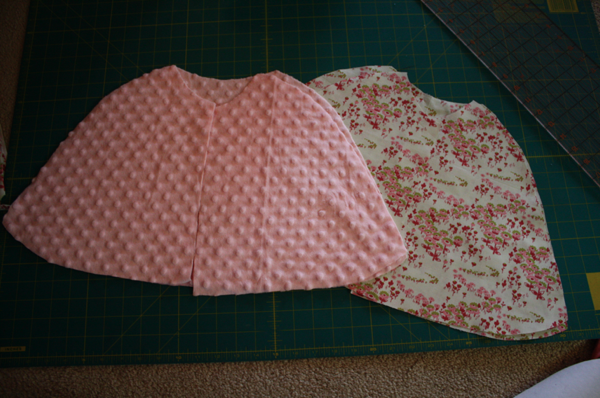
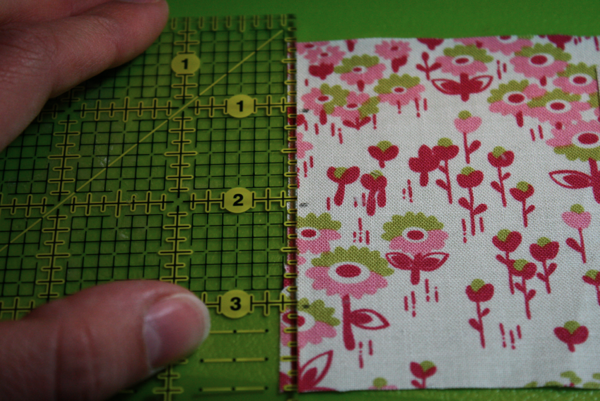
Cut 2 sides and 1 back each for your outer cape and the lining (6 pieces total).


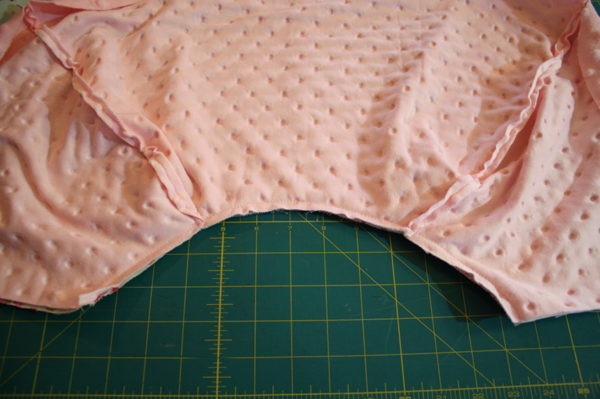
Starting with the lining, sew down both side seams.
Then repeat with the minky outside.
Open them up and put right sides together.
Align the side seams at the neck and pin from seam to seam. Use lots of pins to keep the minky from stretching more than the cotton lining.
Then pin from the seams to the outer shoulder.
Stitch at 1/4″ seam allowance.
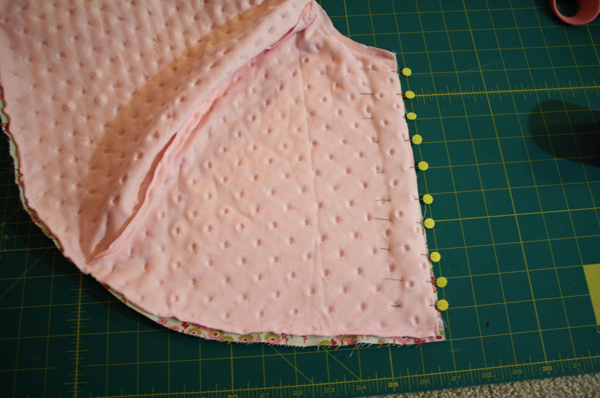
Now go to the bottom, making sure to keep your fabrics laying flat so they’re even, and pin from seam to seam. Sew them together.
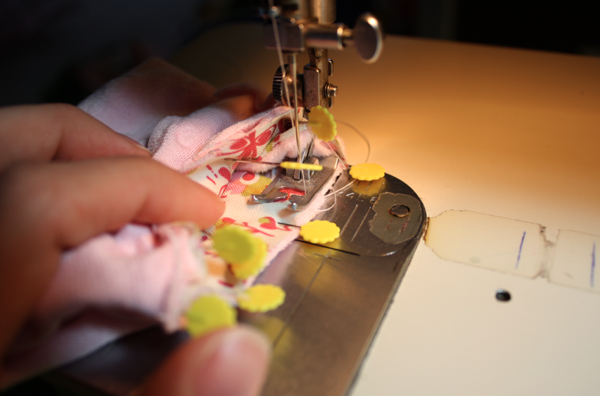
Move to the bottom of one side, leaving a gap about 4 inches wide to turn your cape when you’re finished, pin and sew to the edge.
Do the same up the side, sewing from bottom seam to top seam.
Repeat on the other side, but don’t leave the hole to turn through.
Then I clipped all my edges with pinking shears to make sure my curves laid flat.
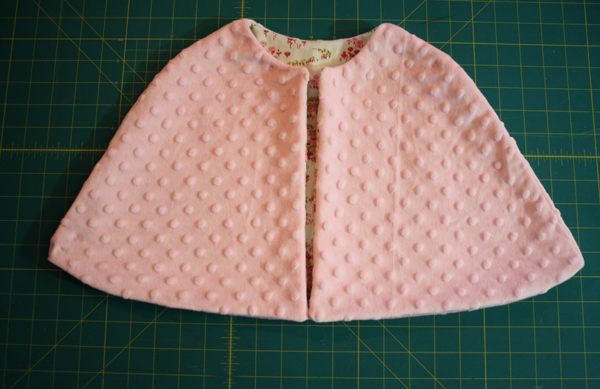
Turn your cape through the hole and smooth.
To help keep my lining and outer cape pieces together, I sewed down the side seams on the outside.
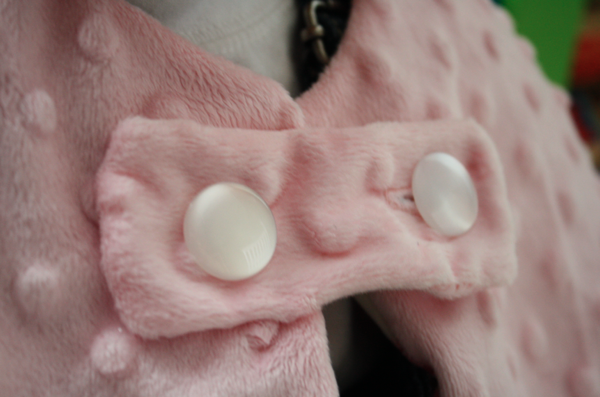
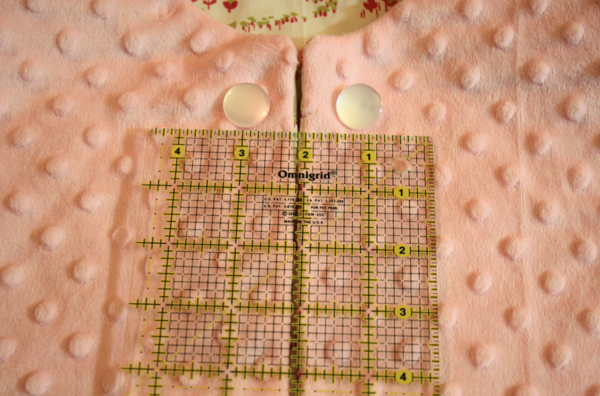
Take your buttons and place them on the front of your cape, measuring how big you want your closure piece to be.
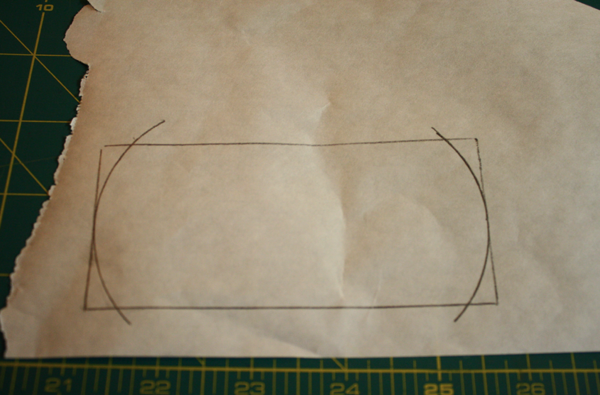
I decided I wanted it 4 inches long and 2 inches wide, so I drew the approximate shape on paper, rounded the edges, and cut out 2 pieces.
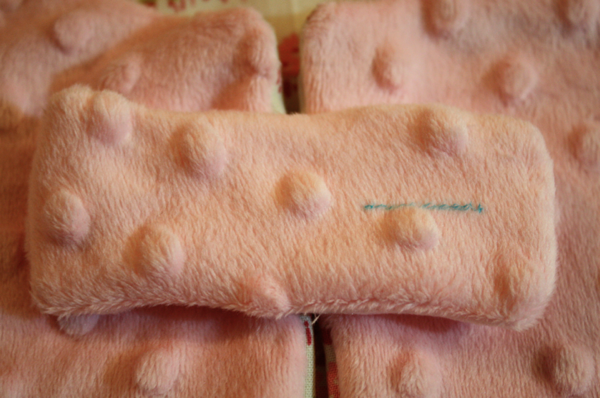
With right sides together, I sewed around the outside, leaving a little 1 inch hole to turn it through, and clipped with my pinking shears.
Turn right sides out, whipstitch the hole closed, and mark your button hole.
Make a buttonhole, hand stitch the closure on one side, and attach buttons.
And you’re done!
Now on to the boots!
For each boot, cut 2 uppers, 2 boot pieces, and 1 sole.
Take your uppers, fold right sides together, and sew across the straight end.
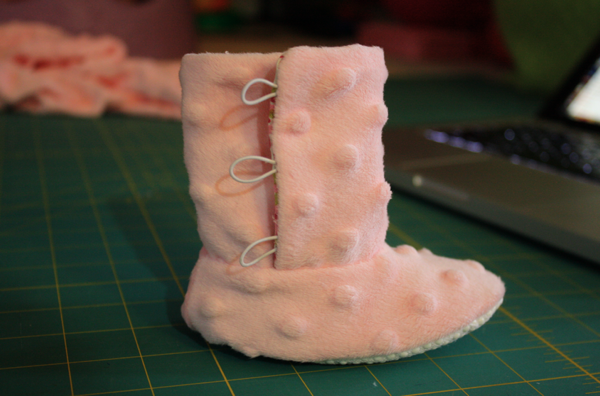
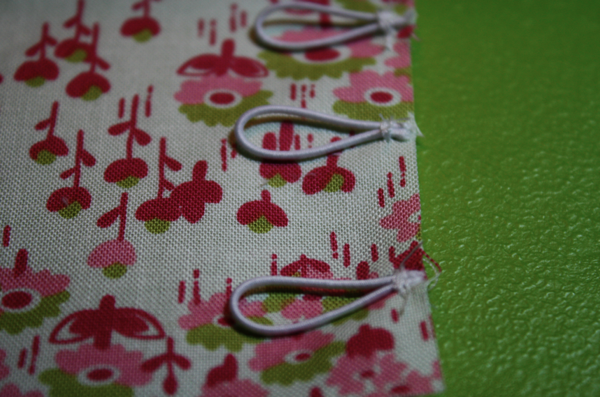
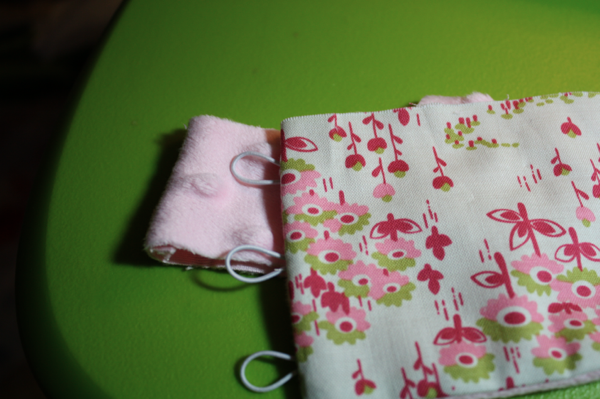
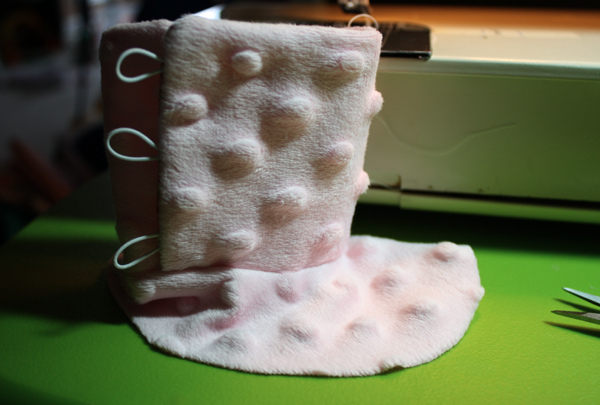
Lay out your boot parts. Mine are 3.5 inches wide, so I measured .75″ from the top and made a mark at 1″, 2″, and 3″ for my elastic loops.
I cut pieces of elastic (I keep the elastic that comes tied on shoes, and that’s what this is from!) 2″ long. Fold them in half, and sew to the lining with the ends of the elastic matching the raw edge of the lining piece.
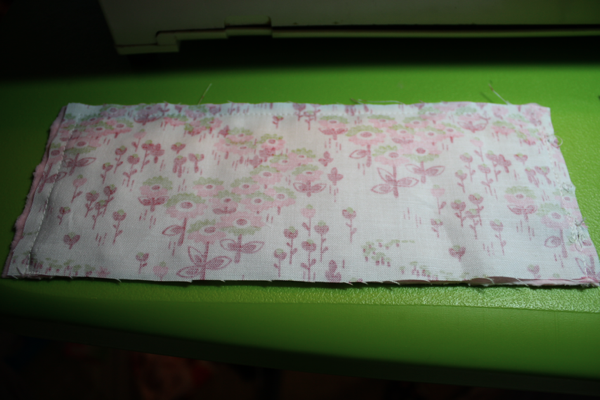
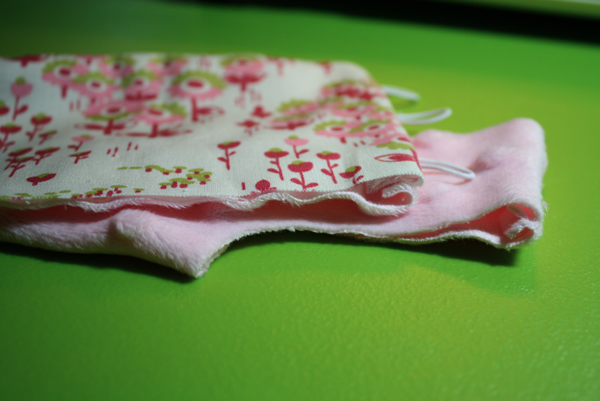
Take the minky outer piece and with right sides together, pin and sew the 2 sides and the top, leaving the whole bottom open.
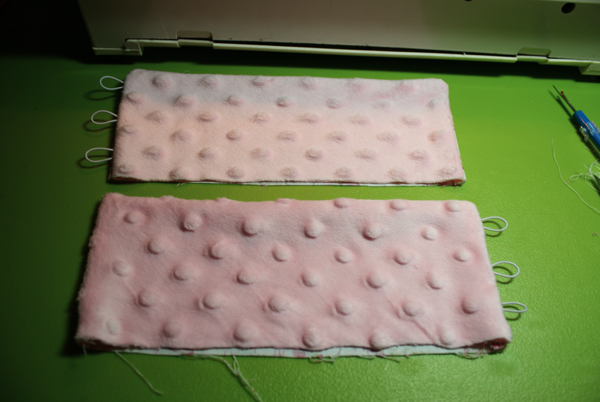
Turn right sides out and press with your fingers. Your elastics should be on opposite ends for the different shoes.
Roll your boot piece, lining it up with the outer side of the shoe (this will be opposite for the other shoe), making sure the elastic pieces are pointing towards the back seam.
With the right sides together, lay the boot piece on the upper, starting at the side.
Pin the pieces together, overlapping the end when you get back to the start.
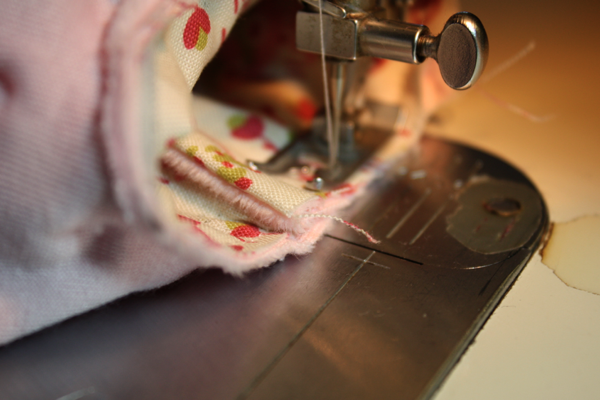
Sew them together, removing the pins as you go.
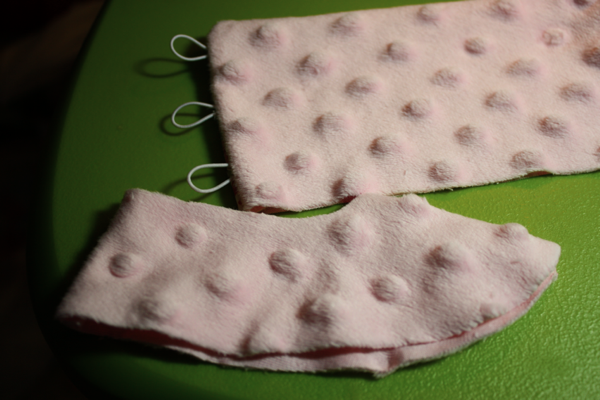
You should now have your finished boot top sewn to the outer upper piece.
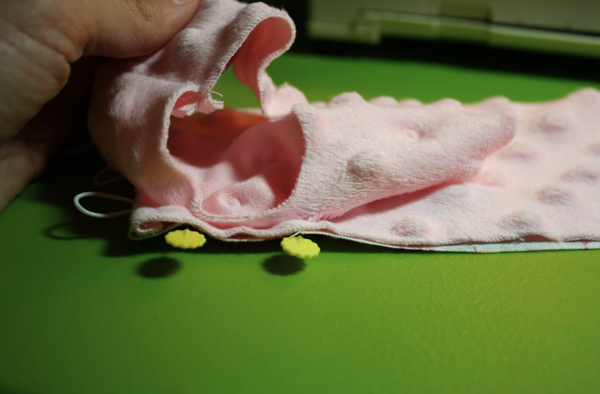
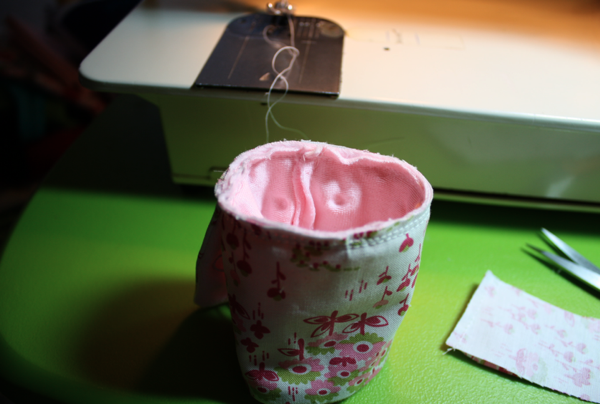
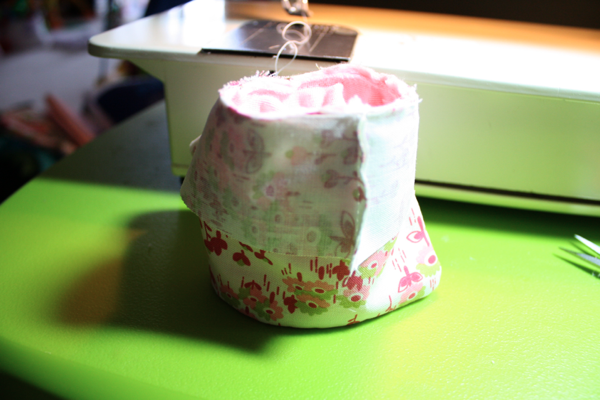
Turn the boot inside out so you’re looking at the boot top lining.
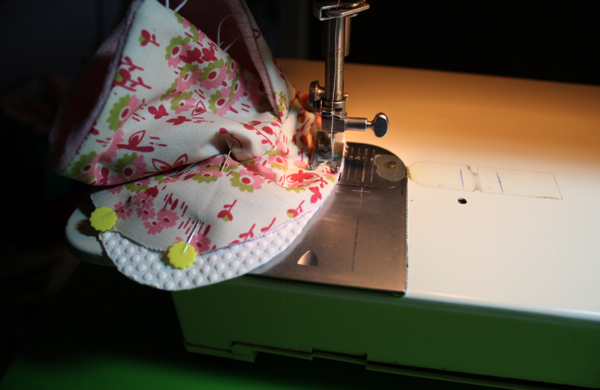
Take the lining upper piece, and with right sides together, put it around the boot top, matching up the back seam with the minky seam in the middle. Sew around the opening again.
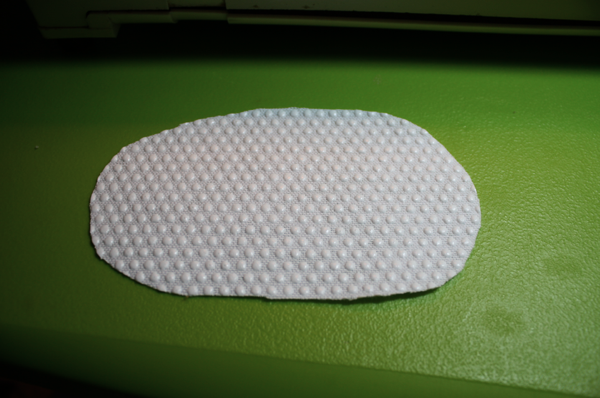
Now take your sole, with the bottom facing up at you,
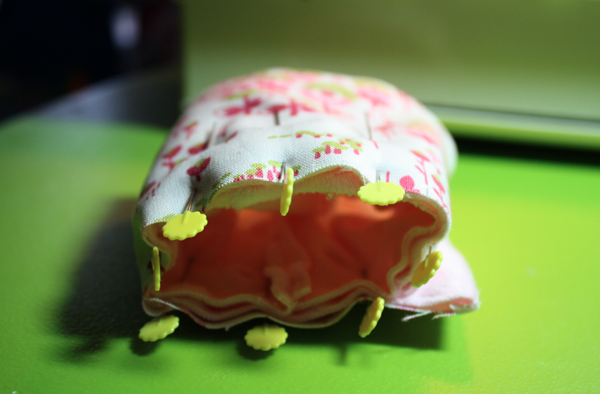
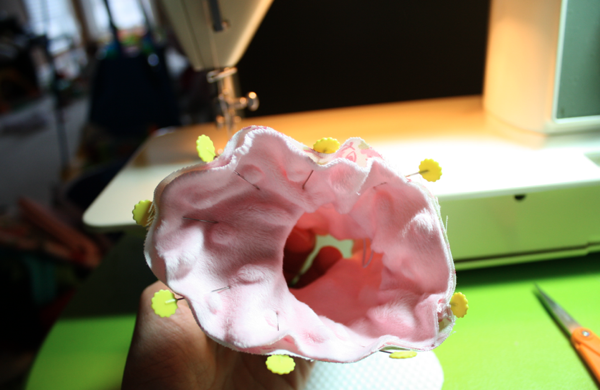
Turn your boot inside out, and pin the upper pieces together to keep them from shifting.
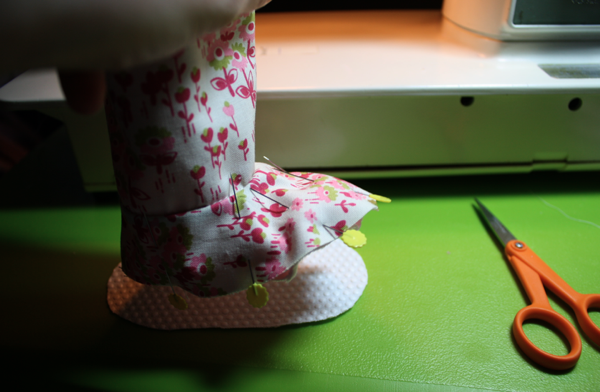
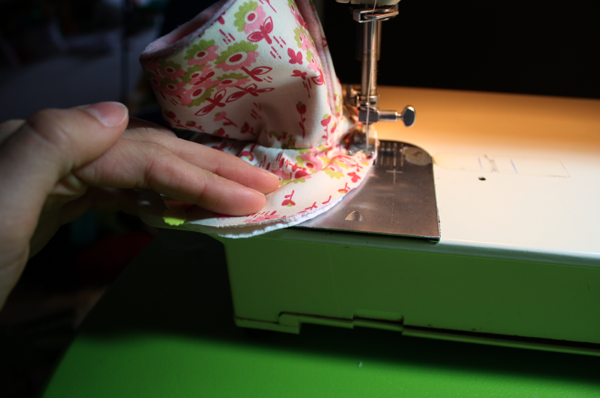
Place the minky side down on the outside of the bottom. Starting at the inside side of the shoe, sew around the perimeter,
making sure to line the edges up as you sew around.
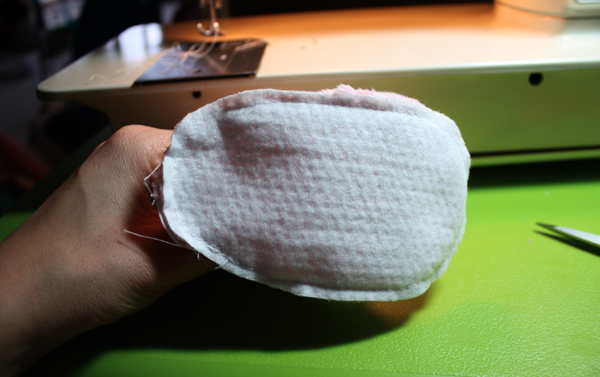
Turn inside out and admire your work.
Sew on buttons then find some sweet little feet to warm up!
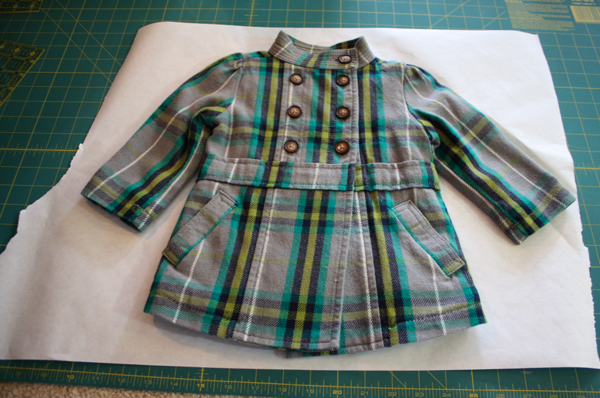
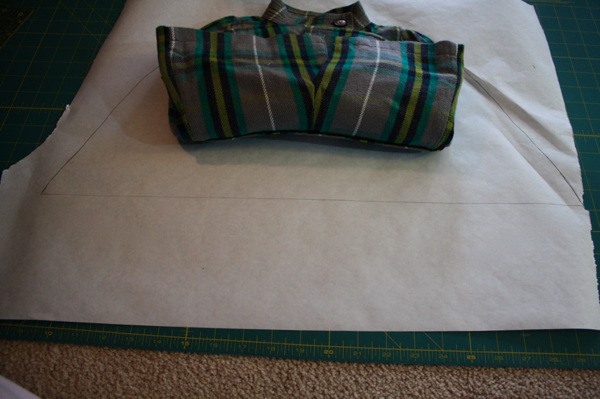
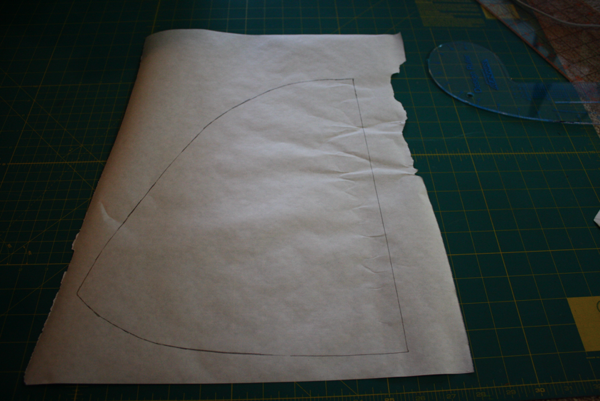
Then to create the cape, I used a 6-12m coat we have (I know, isn’t it ADORABLE?!). I laid it out flat on a piece of freezer paper.

Be aware of any unsolicited help. I promise, they only want to put your tools in their mouth! :)

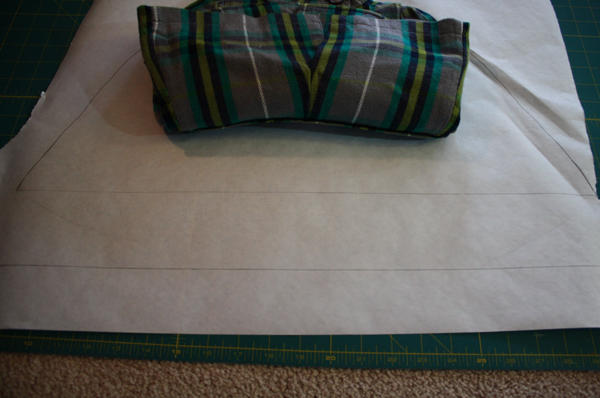
Back to the pattern. (she wrinkled the freezer paper crawling over it, so I’m sorry it’s hard to see that top right part) Draw a line from the start of the collar to the bottom of the sleeve on each side.

Then draw a line straight across the bottom.

Now, the rest of these measurements are the one’s I used for a 12m size cape. It’s still a little big on her, and will probably fit through 24m size, but you might need to figure out your own measurements if making a bigger or smaller size.
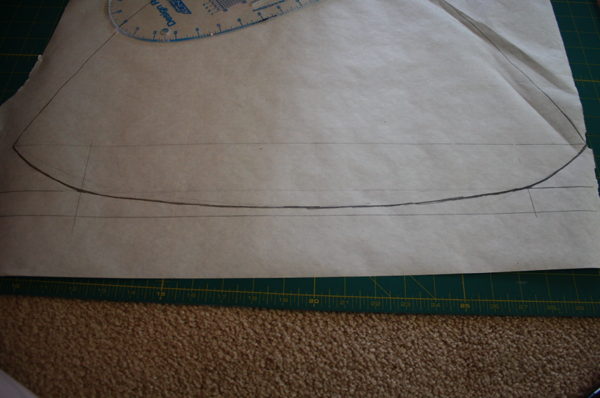
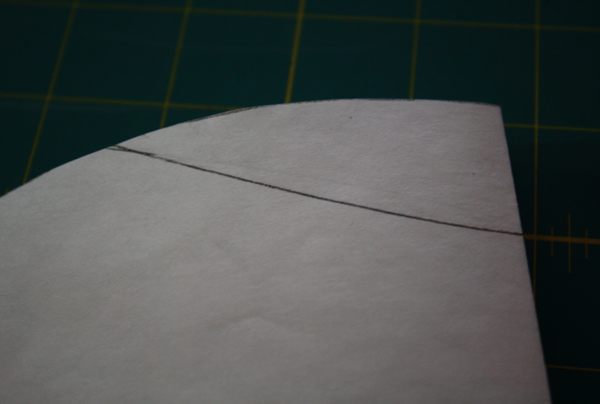
I drew a line 3″ from the bottom line,

Then another one 1″ above the line I just drew. Then I drew a vertical line 2″ from the edge on each side.

Using a curved edge, or freehand if you’re really good, draw a curved line from the outer corner to the intersection of the first 2 lines.

Repeat on the other side. Then draw a line connecting the two, arcing down to right above the lower line.

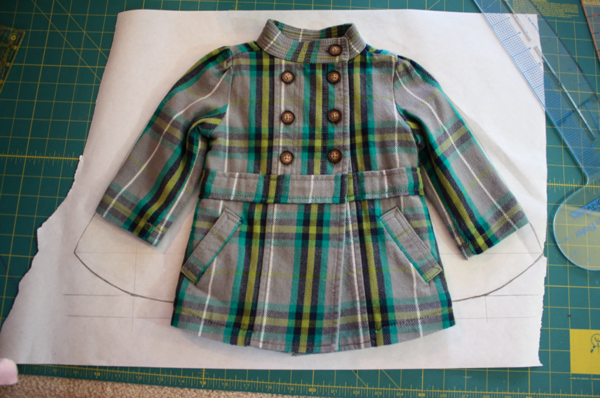
Here’s an idea of the shape of the cape versus the shape of the coat I used to make it.

Then cut out your cape piece on the lines you drew. Fold it in half and make the sides symmetrical, just as you did with the shoes.

Keeping your piece folded in half, trace around it on a separate piece of freezer paper to make a pattern piece for the front of the cape.

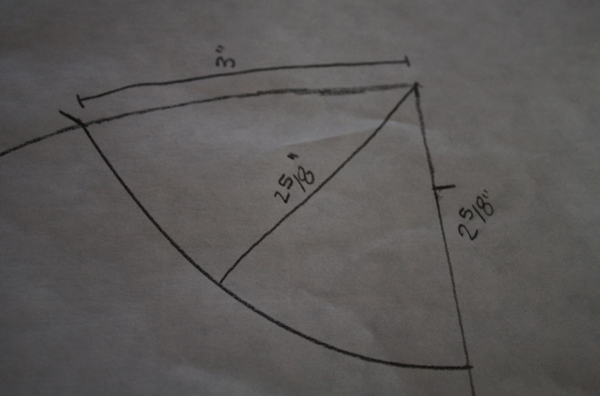
The neck of the cape needs to have a scoop shape to it, so working with the full back piece first, keeping it folded in half, I measured 1″ down the straight folded middle edge, and 3″ out towards the shoulder, then connect them with a curved line.

I transferred the markings to the front pattern piece to have a reference point.

Then I made that curve deeper, using the measurements I marked, making sure to use the same point on the curved shoulder so the front and back pieces will match up perfectly.

Then cut out on your markings, and you have your cape pattern pieces!

Source: sewlikemymom.com

Labels

abstract art Accessories Adult English afghan afghan stitch AGULHAS Amigurumi amirugumi applique Art Árvore de Natal em croche baby crochet Baby Dress baby knitting Baby learn bag Bags BAKTUS Ballet Bun Cover balloons BARRADOS basic shapes Bead Beads Bear Ear Hat BEBÊS beehive quilling belts Berry Birds blanket BLUSAS BOINA BOLEROS BOLSAS books BORBOLETAS bows boxes bracelet Butterfly CACHECOL CACHECOLAR cake candles candy Candy Cane card Cards cartoon carving carving fruit carving fruits CASACO INFANTI CASACOS CASAQUINHO EM CROCHE CASAQUINHO EM TRICO CASAQUINHO PARA BEBÊ CHAPEU Christmas quilling clay COLAR COLAR DE FLORES COLETE coloring CORDÃO CORUJUINHAS crafts CROCHE COM SAQUINHOS PLASTICOS CROCHE IRLANDES crochet Crochet Geek crochet pattern cross stitch Curtain cutting paper DECORAÇAO Dicionário de Trico - Inglês/Portugues Doily Doll Dolls - Búp bê drawing Drawing - Vẽ dress earring Easter ECHARPE edging Embroidery Embroidery - Thêu ENXOVAL PARA BEBÉ ESTOLAS fabric FAIXA PARA CABELOS fashion Felt Floral arrangements - Cắm và bó hoa FLORES Flower flower arrangement flower frame flowers crochet Flowers crochet - Móc hoa Folding boxes - Gấp hộp Folding paper FOLHAS food food decor FREE FORM frustration Funny Galaxy Stitch Gang tay - Tất garden gel grips Giầy - Dép gift Gifts glass Gói quà - gấp nơ GOLINHAS Google+ GORRO Gối cho bé GRÁFICOS Granny Square Graphic Quilling hair clip hats Hats - Mũ Heart Hexagon holiday craft holiday crafts home and garden Home decor - Trang trí nhà Hook Insect Itunes Jesus Jesus Christ jewelery jewelry kirigami Knit knitting knitting pattern knot Knot - Tết dây Làm đẹp làm đồ chơi từ gỗ landscape LEAVES Log Cabin Square LUMINÁRIAS LUVAS LUVINHAS PARA BEBÊ Magazine make up making flower making flowers Making toys Manta MANTA PARA BEBÊ MANTA PARA SOFÁ MEUS MOMENTOS MEUS TRABALHOS mittens Móc đường riềm Móc khăn trải bàn motif Multi-strip Multiples Nail art Nature Scenery necklace Nghệ thuật Nghệ thuật cắt giấy Nghệ thuật vẽ trên kính Nhà đẹp Origami Pachwork painting Painting - Sơn màu PANTUFAS PAP Paper paper cut Patchwork PELERINE pictures Pillows Pillows - Gối plastic Play and learn for baby POLAINA poncho Popcorn puff stitch pumpkin cap QUADRADO Quilled animals quilled art quilled berries Quilled design quilled flowers quilled hollow egg quilled leaves Quilled petal Quilled Picture quilled portrait Quilling paper Quilt RECEITA RECEITA CULINÁRIA RECEITA DE PONTOS recycle recycling RENDA DE PELO DE CABRA repair work ribbon rings rugs SACOLAS SAIAS DE CROCHE SANDÁLIAS EM CROCHÊ SAPATINHOS SAPATINHOS PARA BEBÊ Scarf scarves Scarves - Khăn sewing sewing detail shawls shoes and sandals silhouette Singing skirt snood Snowflake soap socks SQUARE Strawberry SUÉTER sweater Swiffer Sweeper Cover TABELAS DE MEDIDAS DE TRICO E CROCHE tablecloths TAPETES. RECEITA TENIS PARA BEBÊ Thank you tip tips TOALHAS TOUCAS TOUCAS PARA BEBÊ TRICO TÚNICA tunisian Tutorial Tutorial video typography underwear Valentine's day Valentines Day vector art Video VÍDEO video tutorial weaving wedding wood XALE YouTube